Install C++/CLI Support with Visual Studio Installer
How to install "C++/CLI Support" component in Visual Studio? I need to build my Visual Studio C++/CLI applications.
✍: FYIcenter.com
![]() If you want to install "C++/CLI Support" with Visual Studio Installer,
you can follow this tutorial:
If you want to install "C++/CLI Support" with Visual Studio Installer,
you can follow this tutorial:
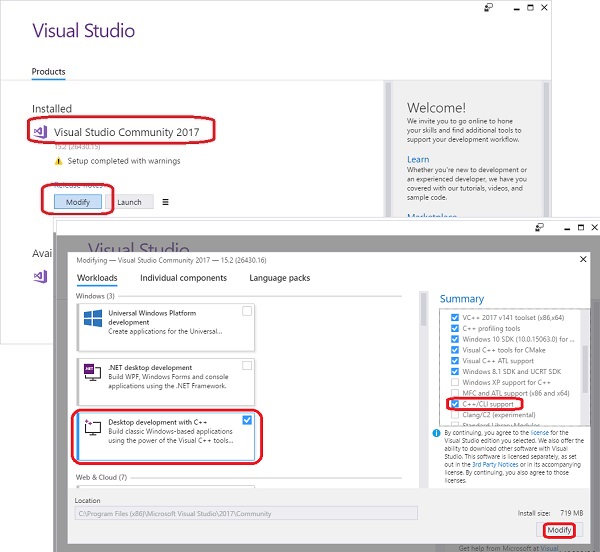
1. Close "Visual Studio". And run "All Programs > Visual Studio Installer". You see "Visual Studio Community 2017" listed as an installed product.
2. Click "Modify" button below "Visual Studio Community 2017". You see the installation selection screen.
3. Click "C++/CLI Support" checkbox in the selection Summary on the right to select it.
4. Click "Modify" button near the bottom right corner. You see the download progress indicator window.
5. Wait for the download the finish. It may take some time, since it about 700MB data to transfer.
6. Start Visual Studio again, when the download and installation is done.
"C++/CLI Support" should be ready for your Visual C++/CLI application now.
The picture below shows you how to install "C++/CLI Support" with Visual Studio Installer:
⇒ Build and Run C++/CLI Programs
⇐ Error on Building C++/CLI Programs
2023-06-19, ∼5786🔥, 0💬
Related Topics: