Console App with VC# Code in Visual Studio 2017
How to build a console application with Visual C# code in Visual Studio 2017?
✍: FYIcenter.com
![]() If you want to build a console application with Visual C# code in Visual Studio 2017,
you can follow this tutorial
If you want to build a console application with Visual C# code in Visual Studio 2017,
you can follow this tutorial
1. Start Visual Studio 2017 with .NET development environment.
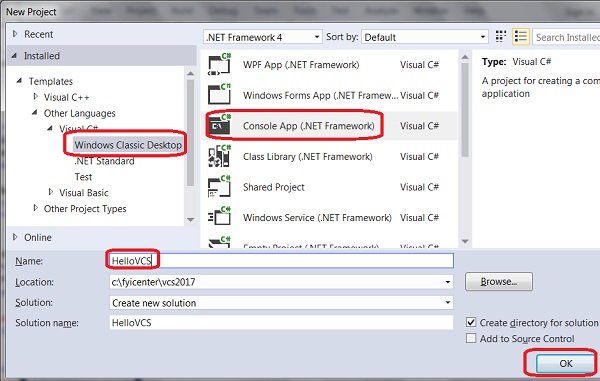
2. Click "File > New > Project" menu. You see the new project box showing up.
3. Select "Console App (.NET Framework) as the project type under "Other Languages > Visual C#" section,
4. Enter the following project name and location:
Name: HelloVCS
Location: c:\fyicenter\vcs2017
Solution name: HelloVCS
5. Click "OK". You see a default console application code displayed.
6. Modify the code with the following:
using System;

namespace HelloVCS
{
    class Program
    {
        static void Main(string[] args)
        {
            Console.WriteLine("Hello World!");
        }
    }
}
7. Click "Build > Build Solution" menu. You should see no build errors.
4. Go to a command console and run final executable code. You should see your application running.
>\fyicenter\vcs2017\HelloVCS\HelloVCS\bin\Debug\HelloVCS.exe
Hello World!
The picture below shows you how to create a VB console application project in Visual Studio 2017:
⇒ VC# Command Line Compiler in Visual Studio 2017
⇐ Windows Forms App with VC# in Visual Studio 2017
2017-08-08, ∼3067🔥, 0💬
Related Topics: