Create C++ Project with Visual Studio 2017
How to Create a C++ Program Project with Visual Studio 2017?
✍: FYIcenter.com
![]() If you are new to Visual Studio 2017,
you can follow tutorial to create your first new C++ program project in Visual Studio 2017.
If you are new to Visual Studio 2017,
you can follow tutorial to create your first new C++ program project in Visual Studio 2017.
1. Start Visual Studio 2017 with Visual C++ development environment.
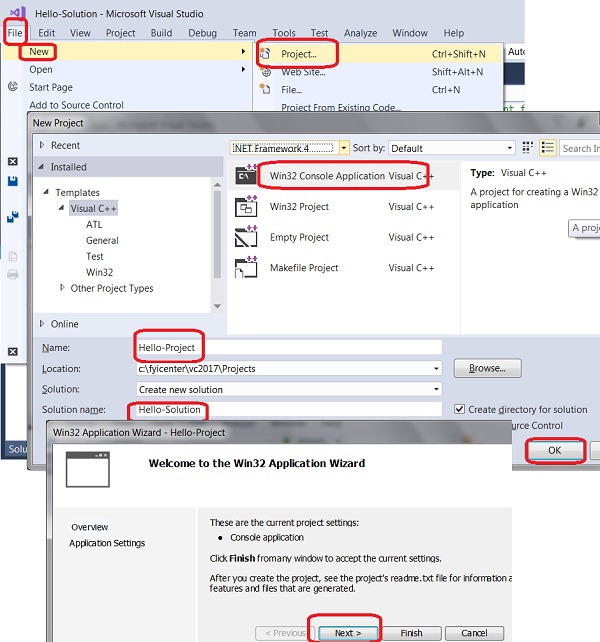
2. Click "File > New > Project" menu. You see the new project box showing up.
3. Select the project type under the Visual C++ templates selection, like "Win32 Console Application", and enter project & solution names.
4. Click "OK". You see the Win32 Application Wizard screen.
5. Click "Next". You see the application settings screen.
6. Click "Finish". You get a new project created and ready to write the C++ code.
The picture below shows you how to create a new project for a Win32 Console Application in Visual Studio 2017:
⇒ C++ Console Application with Visual Studio 2017
⇐ First C++ Program in Visual Studio 2017
2023-12-01, ∼2783🔥, 0💬
Related Topics: